3D Printed Tooling Inserts vs. Machined Aluminum Soft Tooling
Aluminum tooling wins past 300 parts once labor replacement cycles are factored in.
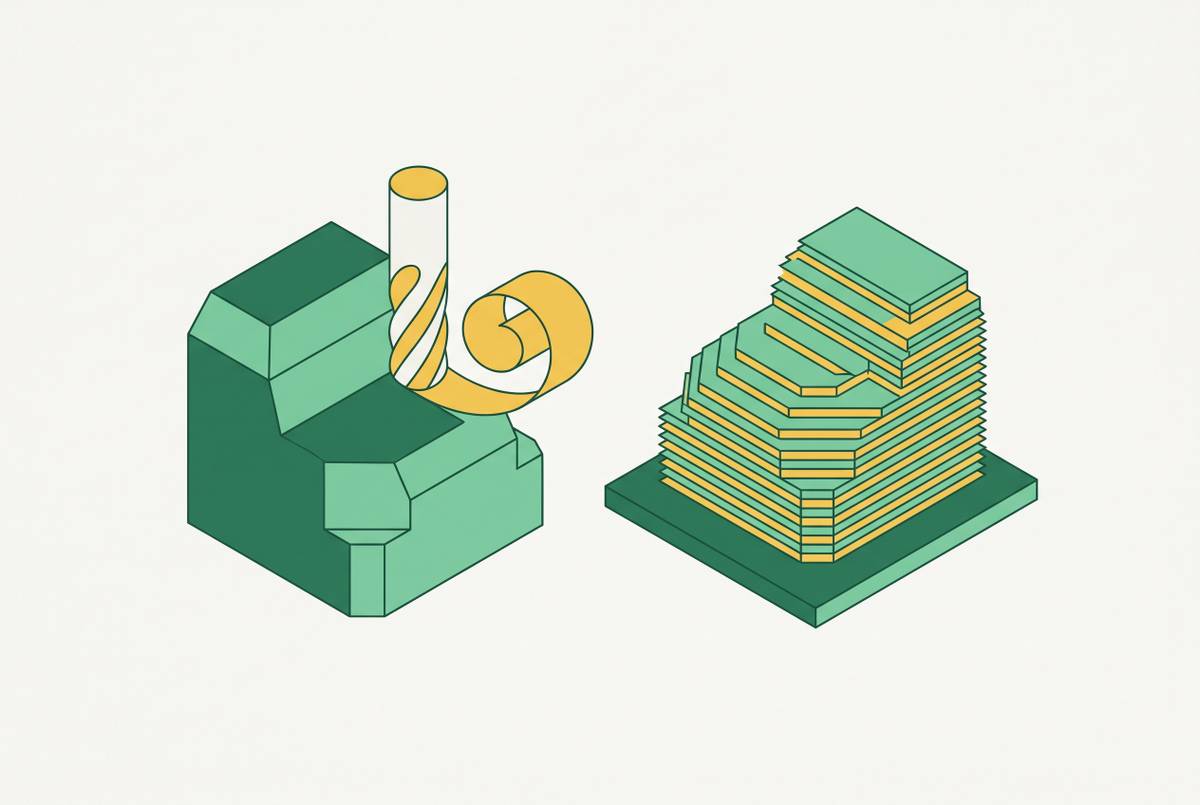
Shot count settles most tooling arguments before anyone mentions surface finish or lead time. Photopolymer and resin 3D-printed inserts wear out fast: expect a reprint, remachine, reassemble, and retest cycle every 50 to 100 shots. Machined aluminum inserts routinely run past 10,000 shots and can push into the 50,000 to 100,000 range depending on the alloy. That gap decides most programs before anyone opens a spreadsheet, and most people get this backwards by pricing the tool instead of pricing the tool's whole working life.
Above roughly 100 to 300 parts, the per-cycle cost of a printed insert stacks up fast. The labor behind every replacement, the sanding, the re-drilling, the re-qualifying, adds up in ways that never show on a quote. Somewhere between 300 and 500 parts, the math flips hard, and aluminum bridge tooling becomes the safer bet, even with a bigger number on the first invoice.
The alloy inside the aluminum category matters too. 6061 runs 40 to 50 HRC and handles roughly 50,000 to 100,000 cycles, making it a common choice for low-volume production runs. 7075, heat treated to 53 to 63 HRC, stretches to about 100,000 to 150,000 cycles and is the better choice wherever abrasive resins are in the mix. Glass-filled and mineral-filled resins chew through both aluminum and printed inserts faster than unfilled material. That wear rate, more than any change in part geometry, is usually what pushes a team from 6061 up to 7075.
Under 100 parts, speed wins, and a printed insert holds up fine. Past a few hundred parts, aluminum wins the full program cost almost every time. Anyone who stops at the first invoice is going to get burned on reprint number six, since that number only tells part of the story.
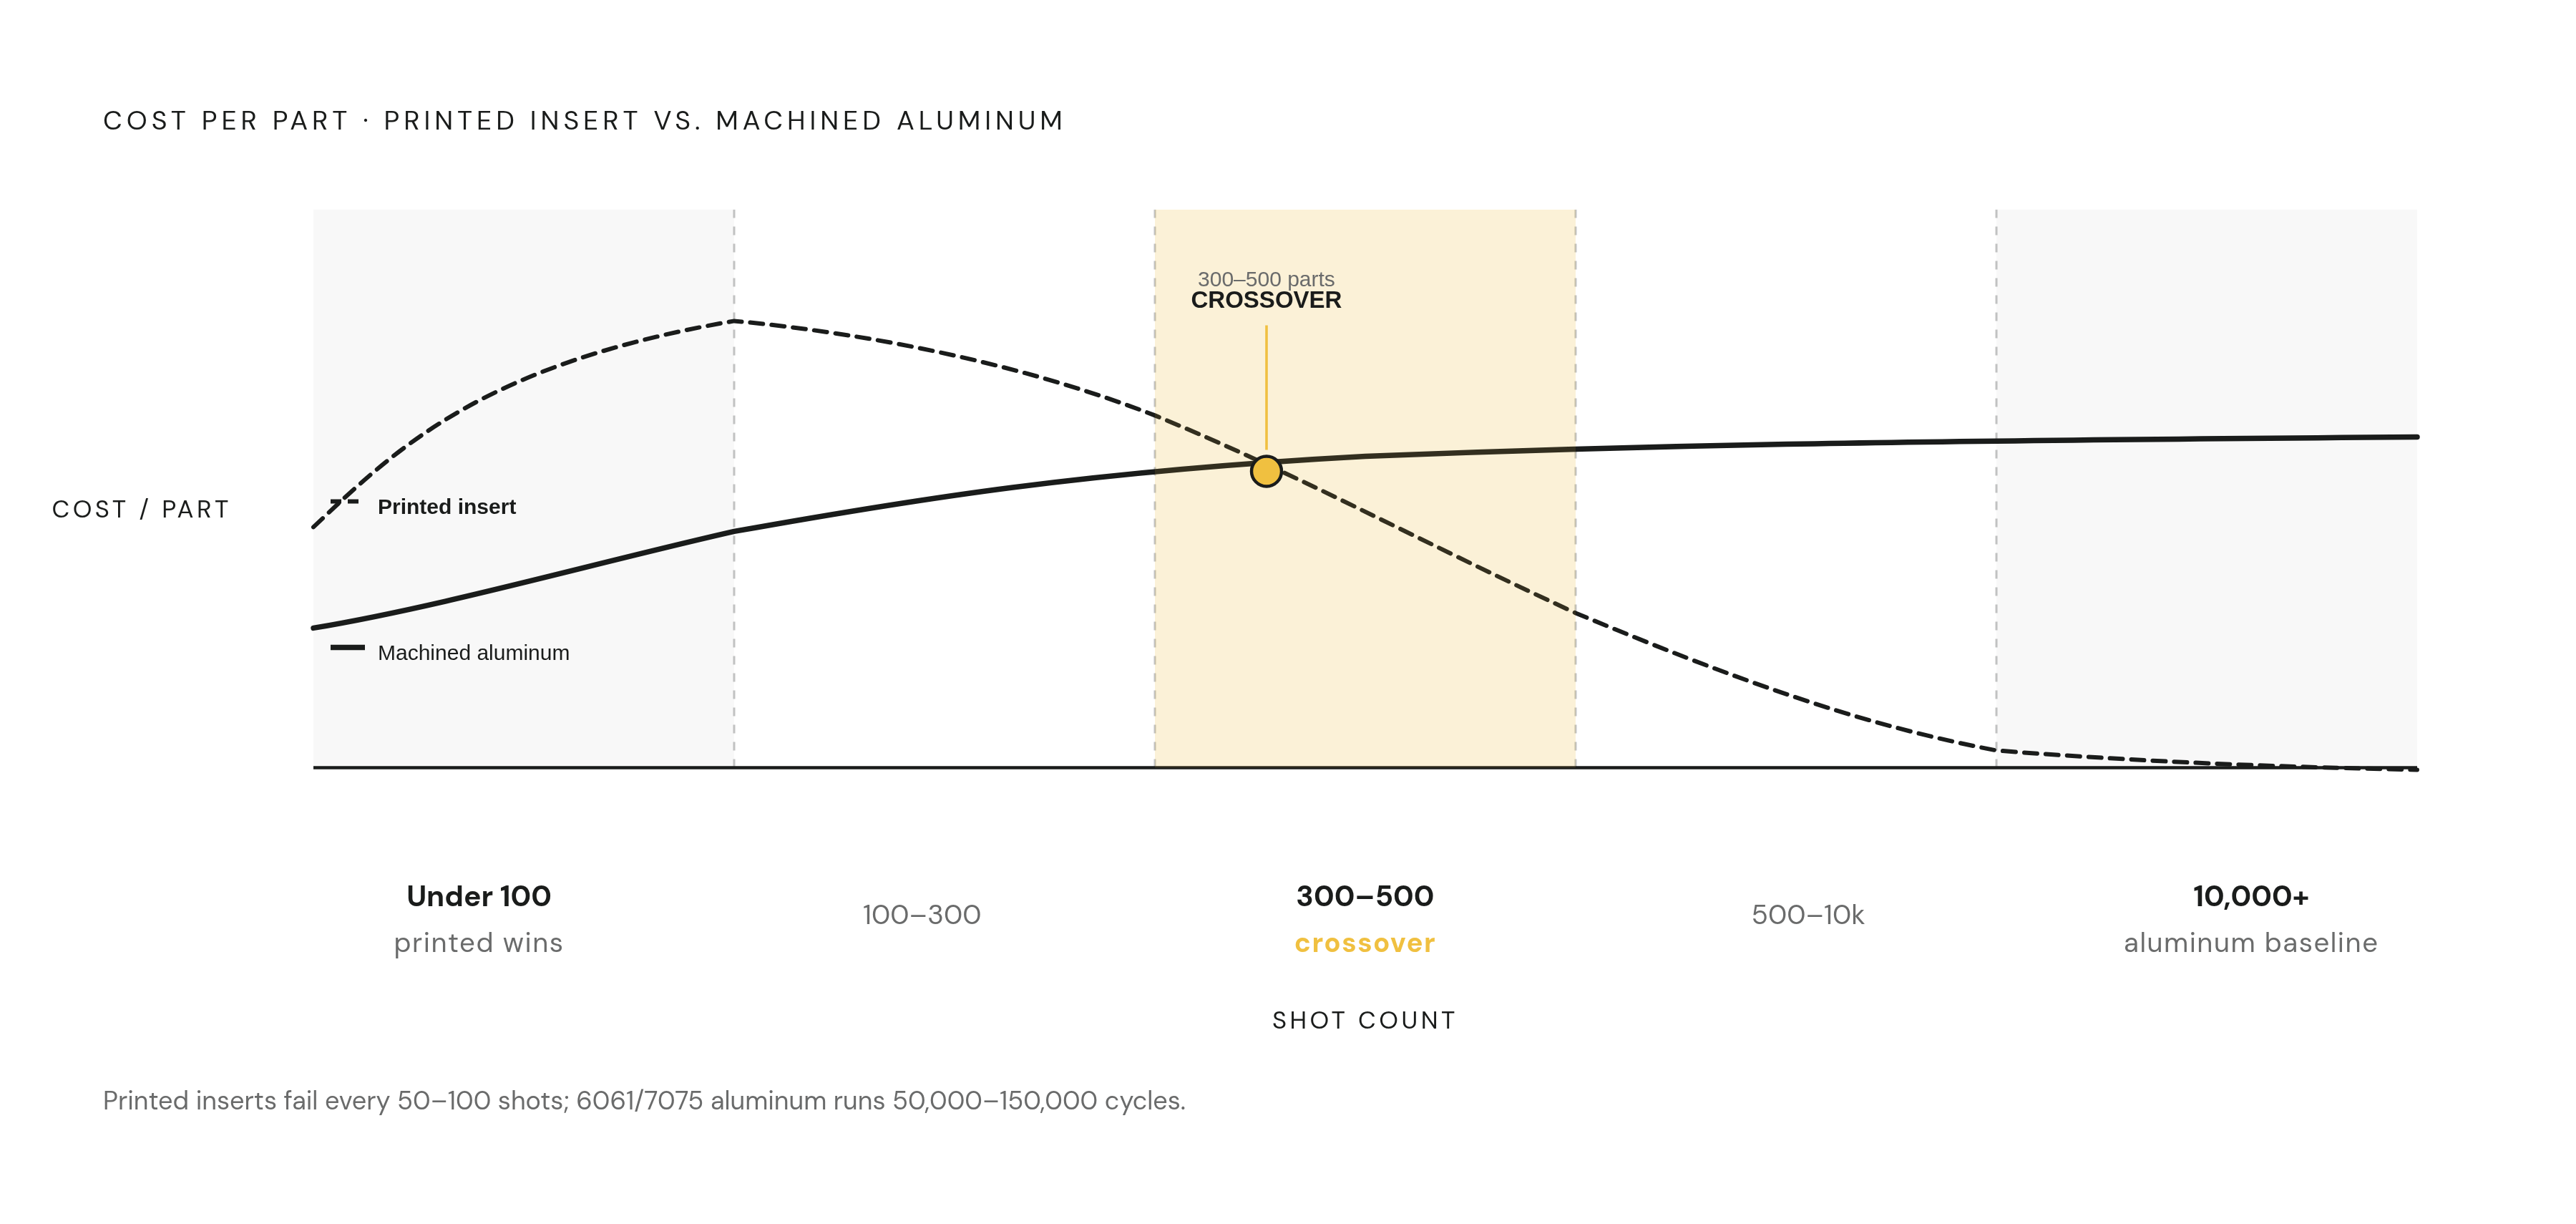
The real cost comparison once tooling replacement cycles are priced in
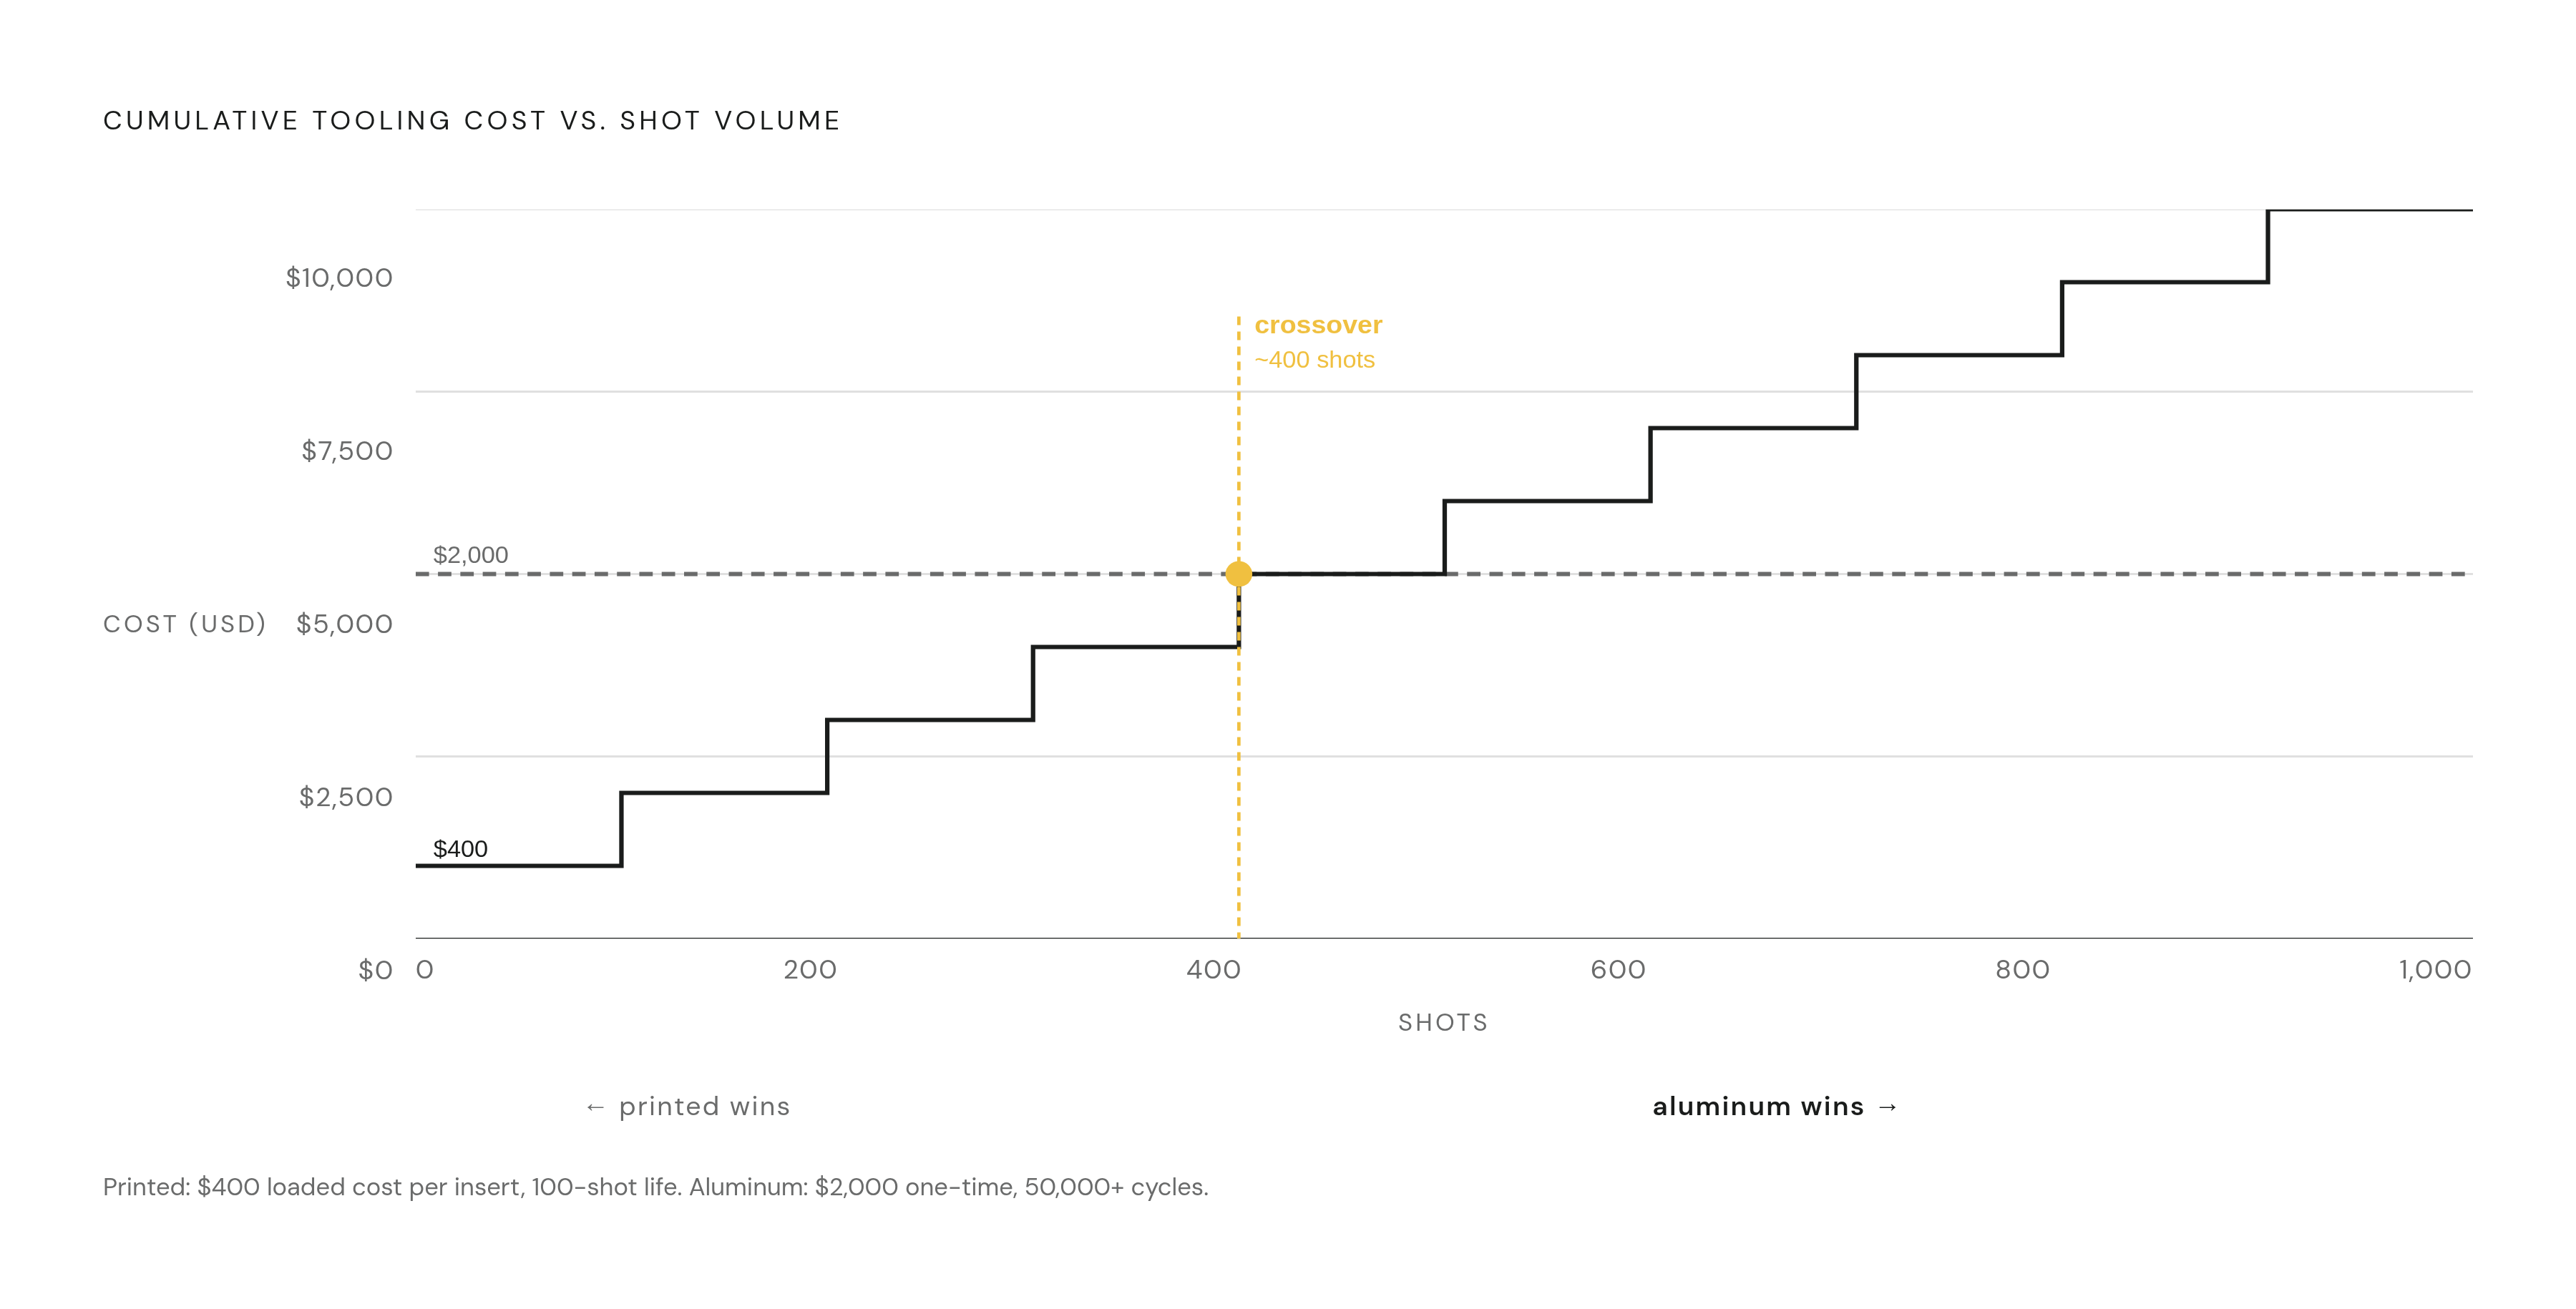
Upfront numbers make printed inserts look like an obvious pick, and that's exactly the trap. A simple resin mold off an SLA printer can run as low as $100. Broader additive bridge molds land between $2,000 and $10,000 for runs of 100 to 1,000 shots. Aluminum soft tooling for a mid-volume run, say 1,000 to 5,000 units, typically costs $2,000 to $5,000, with some shops quoting as low as $1,500 to start. Traditional aluminum bridge tooling for complex geometries can run $15,000 or more before a machined insert earns its keep.
Those upfront figures leave out the real story. A printed insert replaced every 50 to 100 shots across a 1,000-part run has been observed needing ten or more reprints. Each one drags in secondary machining, reassembly, and requalification time that never touches the original quote. Add it up, and the "$100 mold" stops looking cheap, since that number just describes the first pull.
Lead time carries its own cost, separate from tool price. Traditional mold fabrication takes 4 to 6 weeks, and any design change resets that clock. Additive parts and inserts come off the machine in 24 to 48 hours, sometimes 1 to 3 days depending on the process. Teams trying to compress a timeline can expedite aluminum tooling, but should expect to pay a 20% to 30% premium for it.
The crossover point moves with the replacement cycle, not with any fixed volume number. For insert tooling, that 50 to 100 shot ceiling is what drags the printed option out of contention early. The $100 entry point is real, but it applies to a narrow band of volume. Model the whole program, since the invoice only ever captures the first pull.
Surface finish, dimensional tolerance, and material compatibility requirements that tilt toward machined aluminum
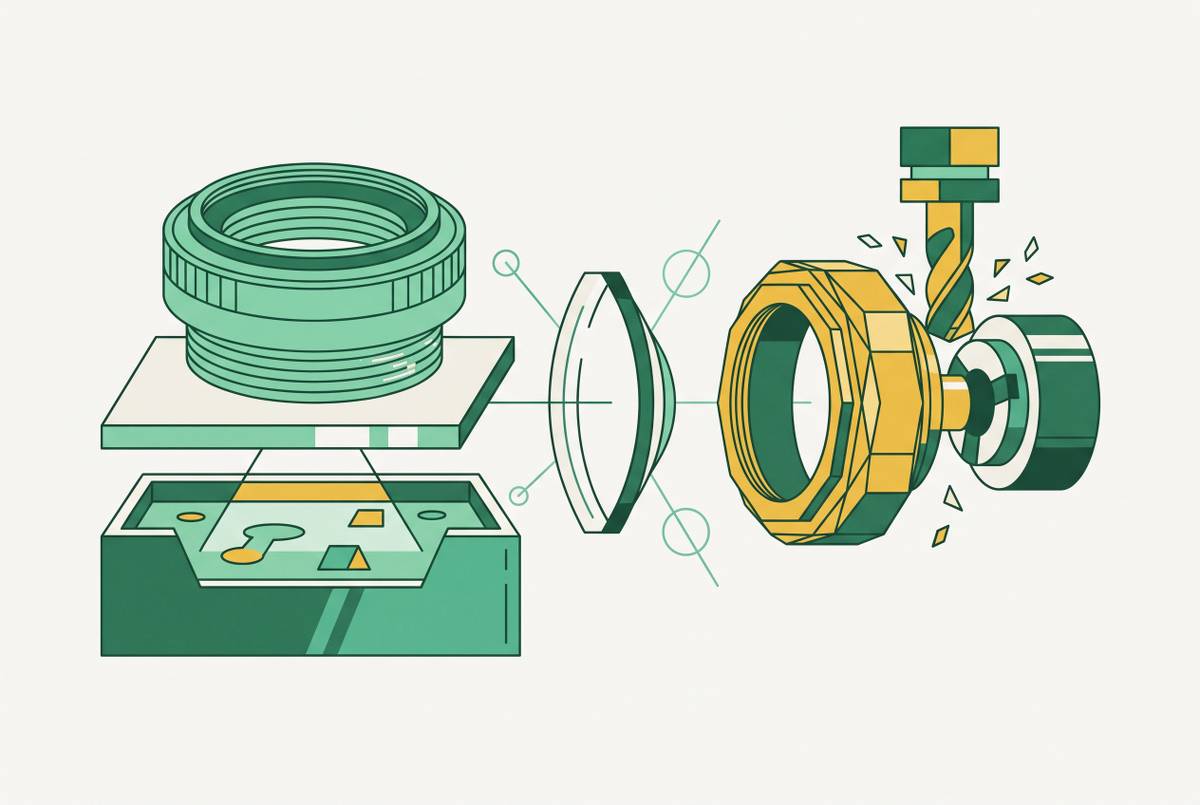
3D printing builds parts in layers, and every angled surface on that build carries a stair-step artifact straight into the molded part. On a sealing surface, a living hinge, or an optical component, that flaw is functional, not cosmetic. It can sink the part outright, and no amount of sanding fully erases it.
Fixing it means secondary work: sanding and polishing to knock down layer lines, reaming or boring holes that need a precise fit, and tapping or milling threaded features by hand. Every one of those steps eats into the print-to-press speed that made the printed insert attractive in the first place. That's the part people forget to weigh in.
Machined aluminum skips most of that. CNC milling cuts straight to drawing tolerance, SPI finish spec, and the draft angles injection molding calls for, usually with no secondary finishing pass at all. Material compatibility follows a similar pattern: high-temperature resins, engineering-grade nylons, and glass-filled compounds throw off heat and abrasive wear that a photopolymer insert can't reliably take. Aluminum handles a much wider range of resins without flinching.
Printed inserts still hold up on clear or lightly textured consumer parts where a light polish gets the job done, or on concept verification shots where dimensional conformance doesn't matter yet. Teams riding the edge of aluminum's wear limit, though, are better off stepping up to steel than babysitting an endless cycle of insert replacement. Steel runs about three times harder than aluminum, and that hardness margin is the actual fix, worth weighing before another round of polishing a printed insert back into spec.
Where 3D-printed inserts genuinely win: early iteration and design-change economics
Cut an aluminum mold too early, and a minor design error found afterward can double the cost of the whole tool. The mold gets scrapped or heavily reworked, and any design change means another 4 to 6 week wait. That risk is exactly where printed inserts earn their keep, and it's the one place they beat aluminum outright on more than price alone.
When iteration speed matters more than shot life, a printed insert lets a team check part geometry, assembly fit, and draft angle in 24 to 48 hours, well before committing $2,000 to $5,000 or more to aluminum. Seen that way, the 50 to 100 shot ceiling stops looking like a weakness. For a team expecting two or three design revisions before locking geometry, printing a fresh insert after each round costs less, in time and money, than reworking an aluminum tool over and over.
That makes printed inserts the right call for a specific set of jobs:
- First-article fit checks on assemblies where geometry is still moving
- Internal concept validation shots that will never reach a customer
- Short-run enclosures or housings with moderate finish needs and true volumes under 100 parts
- Investment casting patterns, where the wax pattern only needs a handful of pulls before the design locks
- Tooling for parts with internal draft changes that would otherwise mean re-fixturing or EDM work mid-revision
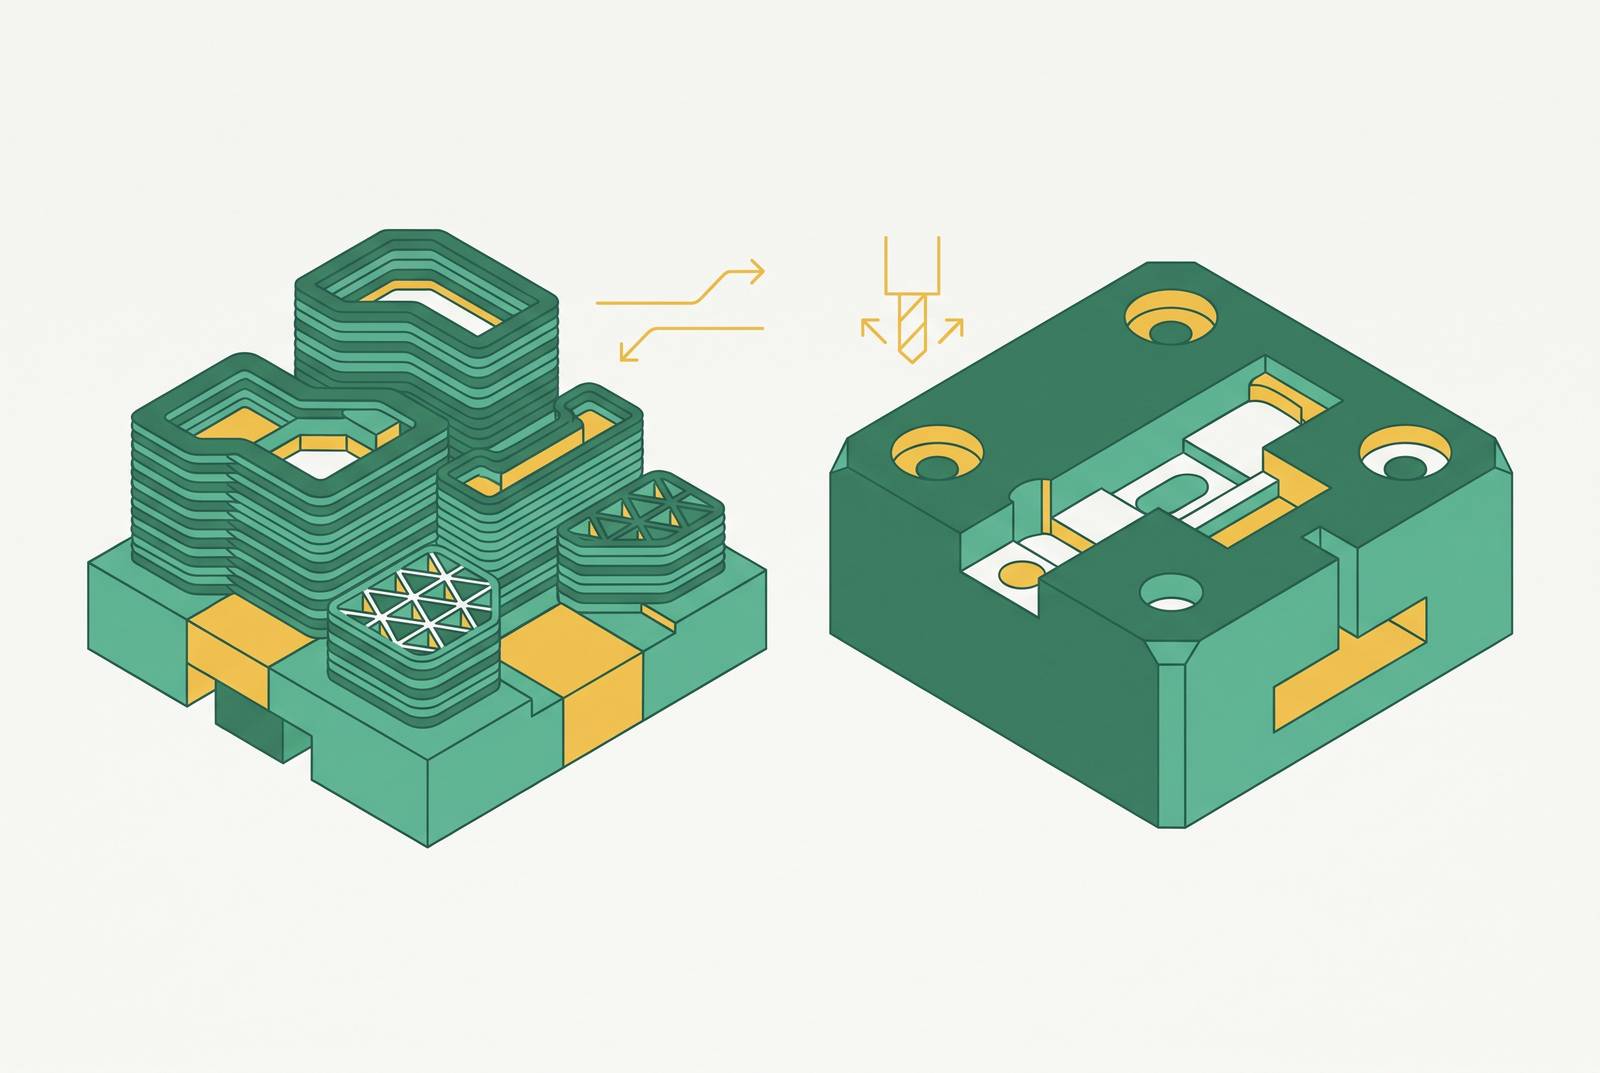
Printed inserts work best as a phase in a program's life, with a shelf life of their own. Treating a printed insert as production tooling tends to catch up with a program eventually. The strongest path for most programs is sequencing: validate geometry on a printed insert through however many revisions it takes, then cut aluminum once the design actually locks.
Conformal cooling inserts: when metal AM earns a place in aluminum tooling
Straight-drilled cooling channels can't follow a part's geometry. The mold heats unevenly, cooling time ends up dominating the cycle, and uneven temperatures cause warpage. Conformal cooling fixes this by curving the channel path to track the part shape, and DMLS, a metal powder-bed additive process, is practically the only production-viable way to build that geometry today.
The gains show up in real numbers. A Star Rapid case study cut cooling time by 38 seconds, a 60% reduction, and eliminated manual air cooling entirely. A separate case brought cycle time down from 45 seconds to 29 seconds, cut warpage in half, and saved $150,000 a year on a 100,000-unit run. These two examples warrant repeated attention because they aren't edge cases; they're what conformal cooling is supposed to do when the geometry is genuinely thermally limited.
Printing the whole mold in metal isn't necessary to capture these gains. The smarter move is finding the thermally problematic zones and applying DMLS only there, leaving the rest of the tool in machined aluminum. Conformal cooling inserts cost more than conventional ones, and that premium only pays off at real production volume, where the cycle-time savings compound across thousands of shots. Below 1,000 shots, the math doesn't clear, so skip it.
The decision variables mapped: a framework for choosing before any metal is cut or any layer is printed
Four variables drive almost every choice between printed and machined tooling.
Shot count. Under about 100 parts, printed inserts are defensible. Between 300 and 500 parts, quick tooling in aluminum becomes worth considering as printed insert economics are outgrown. Past 10,000 shots, 6061 or 7075 aluminum is the baseline, and at meaningful production volumes DMLS conformal cooling becomes worth modeling seriously.
Material requirements. Commodity thermoplastics with no abrasive fill work fine in a printed insert for validation. Engineering resins, glass fill, or high-temperature materials call for aluminum, likely 7075. High-volume runs with aggressive materials may justify stepping up to steel entirely.
Surface finish and tolerance. Functional fit checks and concept reviews tolerate a printed insert, as long as there's budget for post-processing. Sealing surfaces, SPI-specified finishes, and tight tolerances call for machined aluminum from day one.
Timeline and iteration risk. A design still in flux, with more revisions expected, favors printed inserts to put off the aluminum spend. A locked design on a tight timeline, with no room for a second attempt, calls for aluminum, expedited if needed at the 20% to 30% premium that faster tooling lead times typically carry.
A fifth variable gets overlooked more than it should: whether one sourcing partner can quote and deliver both paths. OneWeekParts, a single-source custom parts and assembly platform that quotes and fulfills across CNC machining, 3D printing, and other processes on one BOM, is one example of a supplier built around that model. Teams that split tooling across separate vendors for printed and machined work absorb coordination overhead that cancels out the lead-time edge of whichever process they picked. That coordination gap can quietly erode the lead-time advantage of whichever process was chosen.
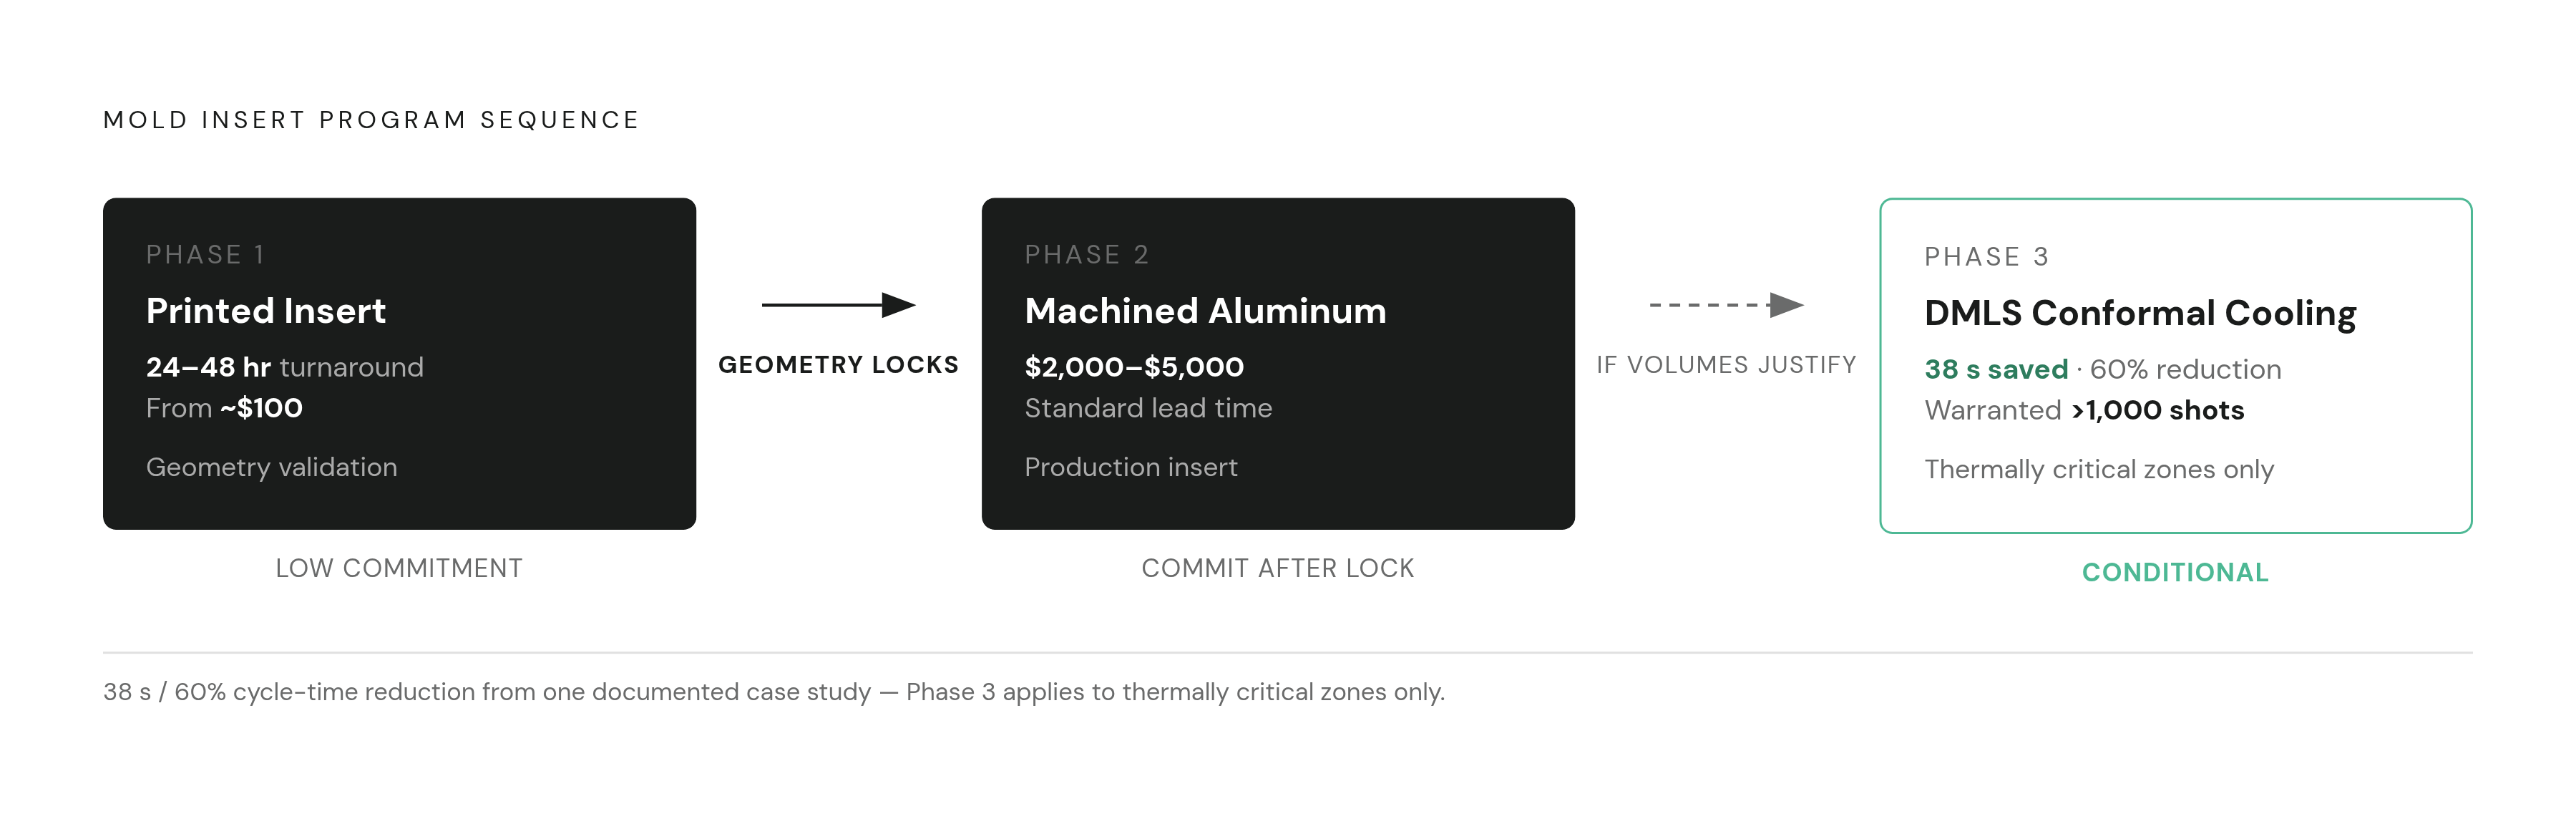
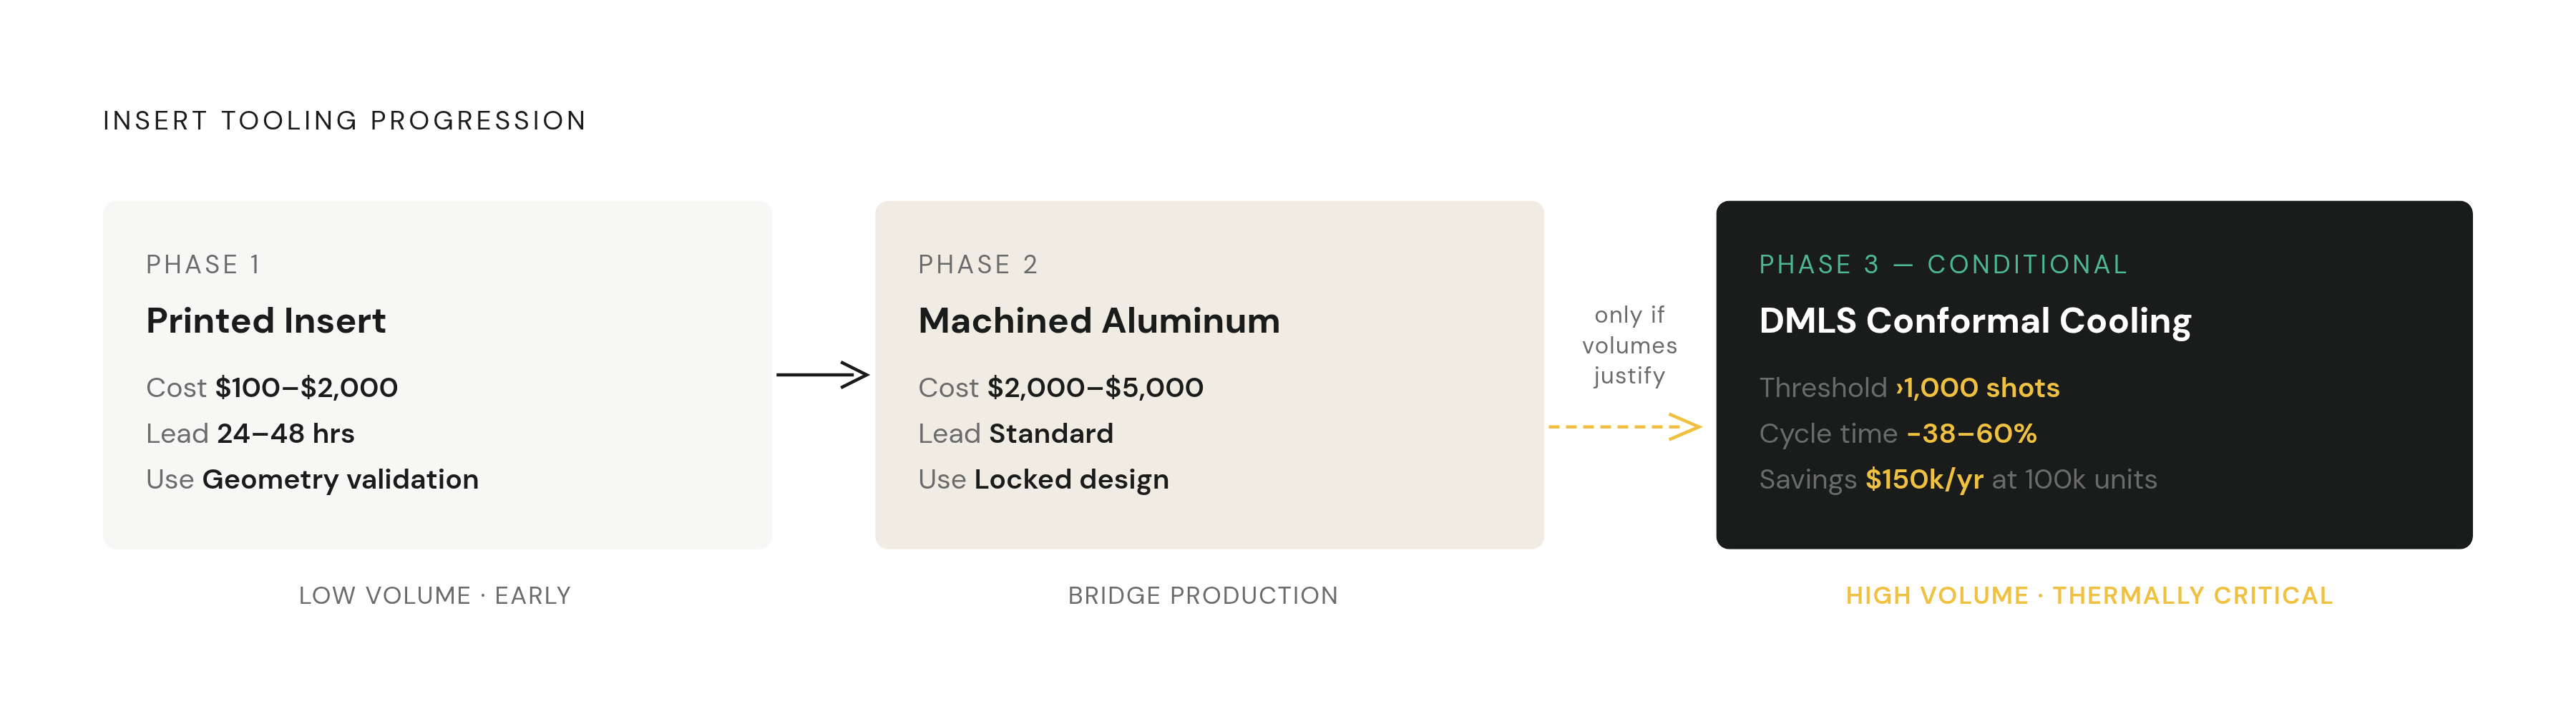
For most development programs, a three-phase sequence works best. Phase one: a printed insert for geometry validation, 24 to 48 hours, with a low entry-level cost. Phase two: a machined aluminum insert once geometry locks, $2,000 to $5,000, with standard tooling lead times to follow. Phase three, if volumes justify it: a DMLS conformal cooling insert for the thermally critical zones only.
Running that sequence well takes a sourcing partner who gives fast DFM feedback on both the part and the insert design, quotes across processes on a single BOM, and inspects quality before parts ship. The handoff between phases is exactly where programs stall when those pieces live with different vendors.
Which approach fits depends on the stage the program is actually at. Every variable that answers that question is knowable before a single dollar gets spent, which makes the wrong choice here almost always a choice made in a hurry.